Building a Custom Calendar App with Next.js, Supabase, Prisma, and TanStack Query


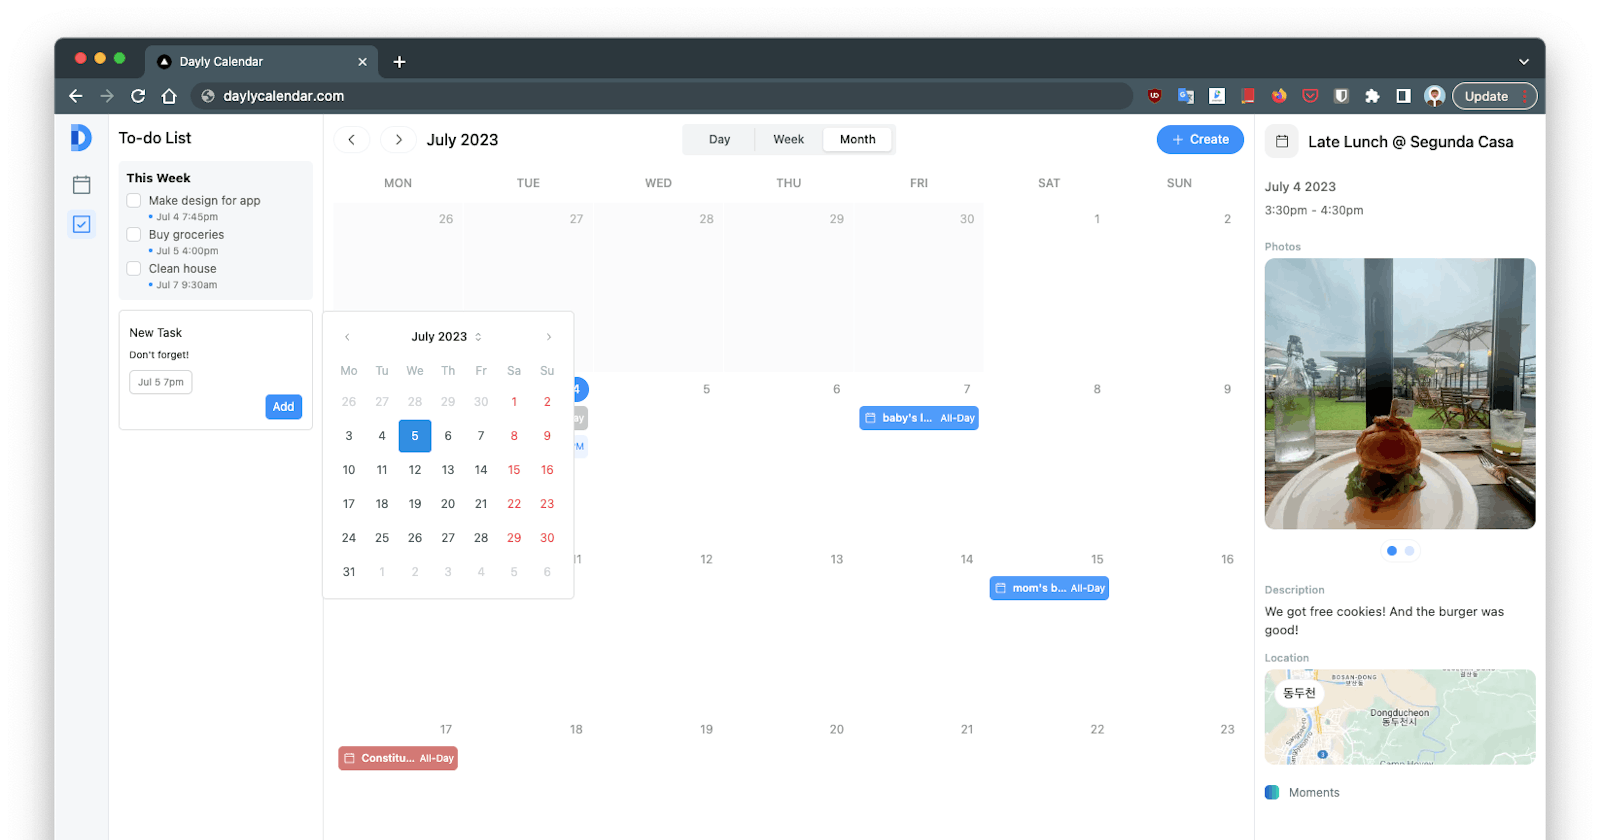
Hello fellow developers! Today, I'm excited to share with you a project that I've been working on: a calendar app with a twist. This isn't your regular calendar app. It's a calendar, a photo journal, and a to-do list, all rolled into one. It's a project that was born out of necessity, curiosity, and a dash of creativity. Let's dive in!
The Motivation
Like many of you, I've used a variety of calendar apps over the years. They're great for keeping track of appointments, deadlines, and important dates. But I found myself wanting more. I wanted a calendar that could also serve as a photo journal, a place where I could visually capture and recall memories associated with specific dates. I also craved a seamless integration of to-do lists into my calendar, allowing me to plan and visualize my tasks alongside my schedule.
When I couldn't find an existing app that met these needs, I decided to build my own!
The Tech Stack
To bring this project to life, I used a combination of Next.js, Supabase, Prisma, and TanStack Query. Next.js provided the foundation for the app, offering a robust framework for building the user interface. Supabase and Prisma were used for the backend, handling data storage and retrieval. Finally, TanStack Query was used for managing and synchronizing data between the client and server.
A Peek Under the Hood
Let's take a quick look at a snippet of the code to get a sense of how it all comes together:
const { data: googleCalendars } = useQuery({
    queryKey: ["googleCalendarList"],
    queryFn: getGoogleCalendarList,
    staleTime: Infinity,
    enabled: isGoogleSignedIn && !!user,
    onSuccess: (
      data: {
        id: string;
        name: string;
        color: string;
      }[]
    ) => {
      setEnabledCalendars(["moments", ...data.map((calendar) => calendar.id)]);
    },
    ...
});
This piece of code is part of the index page of the app. It uses the useQuery hook from TanStack Query to fetch a list of Google calendars. The onSuccess callback then updates the state with the IDs of the enabled calendars.
const googleCalendarEvents = useMemo(() => {
    ...
    if (moments.data) {
      for (const moment of moments.data) {
        const dateKey = dayjs(moment.start).format("YYYY-MM-DD");
        const calEvent = {
          id: moment.id,
          calendar: "Moments",
          start: moment.start,
          end: moment.end,
          allDay: moment.all_day,
          summary: moment.title,
          description: moment.description,
          location: moment.location,
          htmlLink: "",
          photoIds: moment.photos.map((photo: { g_photo_id: string }) => {
            return photo.g_photo_id;
          }),
        };
        ...
      }
    }
    return calendarEvents;
  }, [googleCalendarEventsByCalendar, moments.data]);
This snippet demonstrates how the app integrates photos into calendar entries. It uses the useMemo hook to create a memoized version of the calendar events, which includes a photoIds property for each event. This property is an array of photo IDs, which are used to fetch and display the associated photos.
Crafting the UI: The WeekEventCard Component
One of the most visually engaging parts of the app is the WeekEventCard component. This component represents an individual event on the calendar and is designed to provide a snapshot of the event details at a glance. Let's dive into how it's built.
const WeekEventCard: FC<{
    googleCalendars: any;
    calendarEvent: any;
    googlePhotos: any;
    moments: any;
    setSelectedEvent: any;
    setEventDetailsVisible: any;
    handleContextMenu: (e: React.MouseEvent<HTMLDivElement, MouseEvent>, event: GoogleCalendarEvent, calendar: string) => void;
}> = ({
    googleCalendars,
    calendarEvent,
    googlePhotos,
    moments,
    setSelectedEvent,
    setEventDetailsVisible,
    handleContextMenu,
}) => {
    ...
}
The WeekEventCard component receives several props, including the event data (calendarEvent), a list of Google calendars (googleCalendars), Google photos (googlePhotos), and moments (moments). It also receives several callback functions to handle user interactions like selecting an event and opening the event details modal.
Coloring the Card
One of the key features of the WeekEventCard is its dynamic color scheme. The color of the card is determined by the associated calendar, providing a visual cue that helps users quickly identify the source of each event.
const calendarColor = calendarEvent.calendar === 'Moments' ? 'rgb(65, 140, 253)' : hexToRgb(
    googleCalendars?.find(
        (cal: any) =>
            cal.name === calendarEvent.calendar
    )?.color!
);
In the code above, we first check if the event is from the 'Moments' calendar. If it is, we use a predefined color. If not, we find the corresponding Google calendar and use its color.
Displaying the Location
Another interesting feature of the WeekEventCard is the way it handles event locations. If an event has a location, we display a map image using the Google Maps API.
const googleMapsImageUrl = getGoogleMapImageUrl(calendarEvent.location, 400, 300, 15);
The getGoogleMapImageUrl function generates a URL for a static Google Maps image based on the event location. This image is then used as a background image for the location section of the card.
Wrapping Up
The WeekEventCard component is a great example of how we can create a rich, interactive UI with React. By leveraging the power of React and the flexibility of CSS, we're able to create a visually engaging and user-friendly calendar app that goes beyond the basics. And the best part? This is just the beginning. As the project continues to evolve, I'm excited to see what other UI innovations we can come up with. Stay tuned!
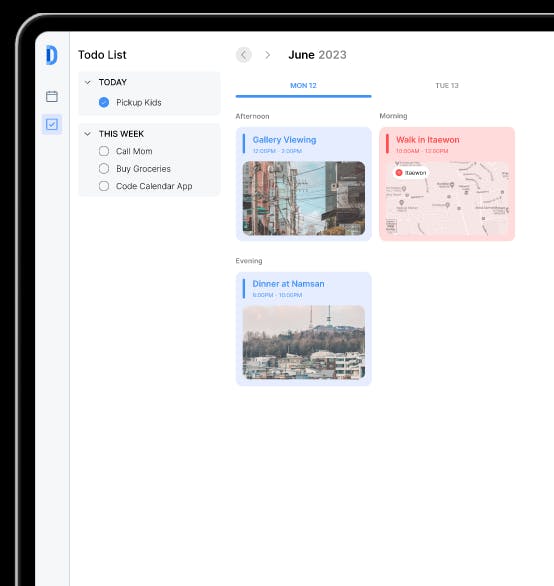
Integrating To-Dos into the Calendar
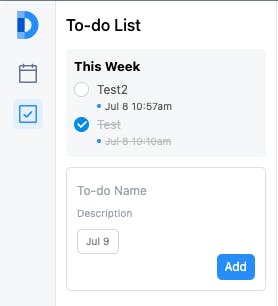
One of the unique features of this app is the integration of to-do lists directly into the calendar. This allows users to visualize their tasks in the context of their schedule, making it easier to plan and manage their time effectively.
Let's take a look at how this is implemented in the code:
if (todos.data) {
  for (const todo of todos.data) {
    const dateKey = dayjs(todo.date).format("YYYY-MM-DD");
    const calEvent = {
      id: todo.id,
      calendar: "Todos",
      start: todo.date,
      end: todo.date, // assuming the todo due date is the end date as well
      allDay: true, // assuming todos are all day events
      summary: todo.title,
      description: todo.description,
      location: todo.location, // assuming todos don't have a location
      htmlLink: "",
      checked: todo.checked,
    };
    const existingEvents = calendarEvents[dateKey] || {
      allDayEvents: [],
      morningEvents: [],
      afternoonEvents: [],
      eveningEvents: [],
    };
    const allDayEvents = existingEvents.allDayEvents;

    allDayEvents.push(calEvent);

    calendarEvents[dateKey] = {
      allDayEvents: allDayEvents,
      morningEvents: existingEvents.morningEvents,
      afternoonEvents: existingEvents.afternoonEvents,
      eveningEvents: existingEvents.eveningEvents,
    };
  }
}
In this snippet, we're iterating over the list of to-dos (retrieved from todos.data). For each to-do, we create a calEvent object that represents the to-do as a calendar event. This object includes properties like id, start, end, summary, description, and checked (which indicates whether the to-do has been completed).
We then add this calEvent to the list of all-day events for the corresponding date (dateKey). This is based on the assumption that to-dos are all-day events, but you could easily modify this logic to accommodate time-specific to-dos.
By integrating to-dos into the calendar in this way, we're able to provide a unified view of the user's schedule and tasks. This makes it easier for users to plan their day, see what tasks they have coming up, and ensure that nothing falls through the cracks. It's a simple feature that adds a lot of value to the app.
The Journey Continues
As with any project, the creation of this app is a journey, not a destination. While I've made great strides in integrating calendar functionality, photo journaling, and to-do list management into a single application, there's still much more to explore and develop.
The beauty of software development is that it's a dynamic and ongoing process. As I continue to use the app, I'm constantly discovering new features to add, tweaks to make, and bugs to squash. It's a living, evolving project that grows and changes with my needs and the feedback of early users.
In the future, I'm looking forward to refining the user interface, optimizing performance, and perhaps even exploring new functionalities like AI-driven entry creation or predictive task scheduling. The possibilities are endless, and that's what makes this journey so exciting.
So, if you're embarking on a similar journey, remember that it's okay for your project to be a work in progress. Embrace the process of continuous learning and improvement. After all, the journey is where the fun is!